
Manx Quilting

Manx Quilting takes us back in time dating as early as 1820. Manx refers to the native Celtic people that lived on the Isle of Man (an island located in the middle of the Irish Sea between England, Scotland, Wales and Ireland.) They may have used scraps of fabric or repurposed fabrics that no longer serve for the use they were intended for. The authentic method uses their hands for measuring, and not a ruler or other basic tools. Manx quilting takes a traditional Log Cabin block and adds a technique that adds “sew” much character and personalization to the quilt.
A video is on our YouTube Channel for a complete demonstration. You can find it at: Manx Quilting
Fabric Requirements & Supplies:
Light and dark fabric strips
Contrast color for the center square
Foundation (backing) fabric
Sewing thread and needle (Note: the thread will show on the back. Therefore, you may want to match your thread to the same color as your foundation fabric.)
Pins
Scissors
Instructions:
1. For the fabric which is going to be the foundation of your block, measure the span of your hand. Rounding to the nearest half, cut a square with the measurement of your hand span. My span is 7 ¾”. Therefore, I cut my squares at 8 inches.
2. For the center square, measure from the tip of the middle finger to the base, and round to the nearest ½”. Mine measures almost 3.5”. Therefore, I cut 3.5” squares.
3. For the strips (or logs), measure from the length of the base of the thumb joint to the bottom of the thumbnail. For me that was 2″. However, I went with the easy button and used 2.5” strips. This is your quilt, and embracing the authentic method would be fantabulous! You will trim the lengths, as you build the block.
As everyone’s hand and digits are different sizes, you can see how personal this quilt really becomes!

4. Prep the foundation fabric:
Fold your fabric corner to corner and press.
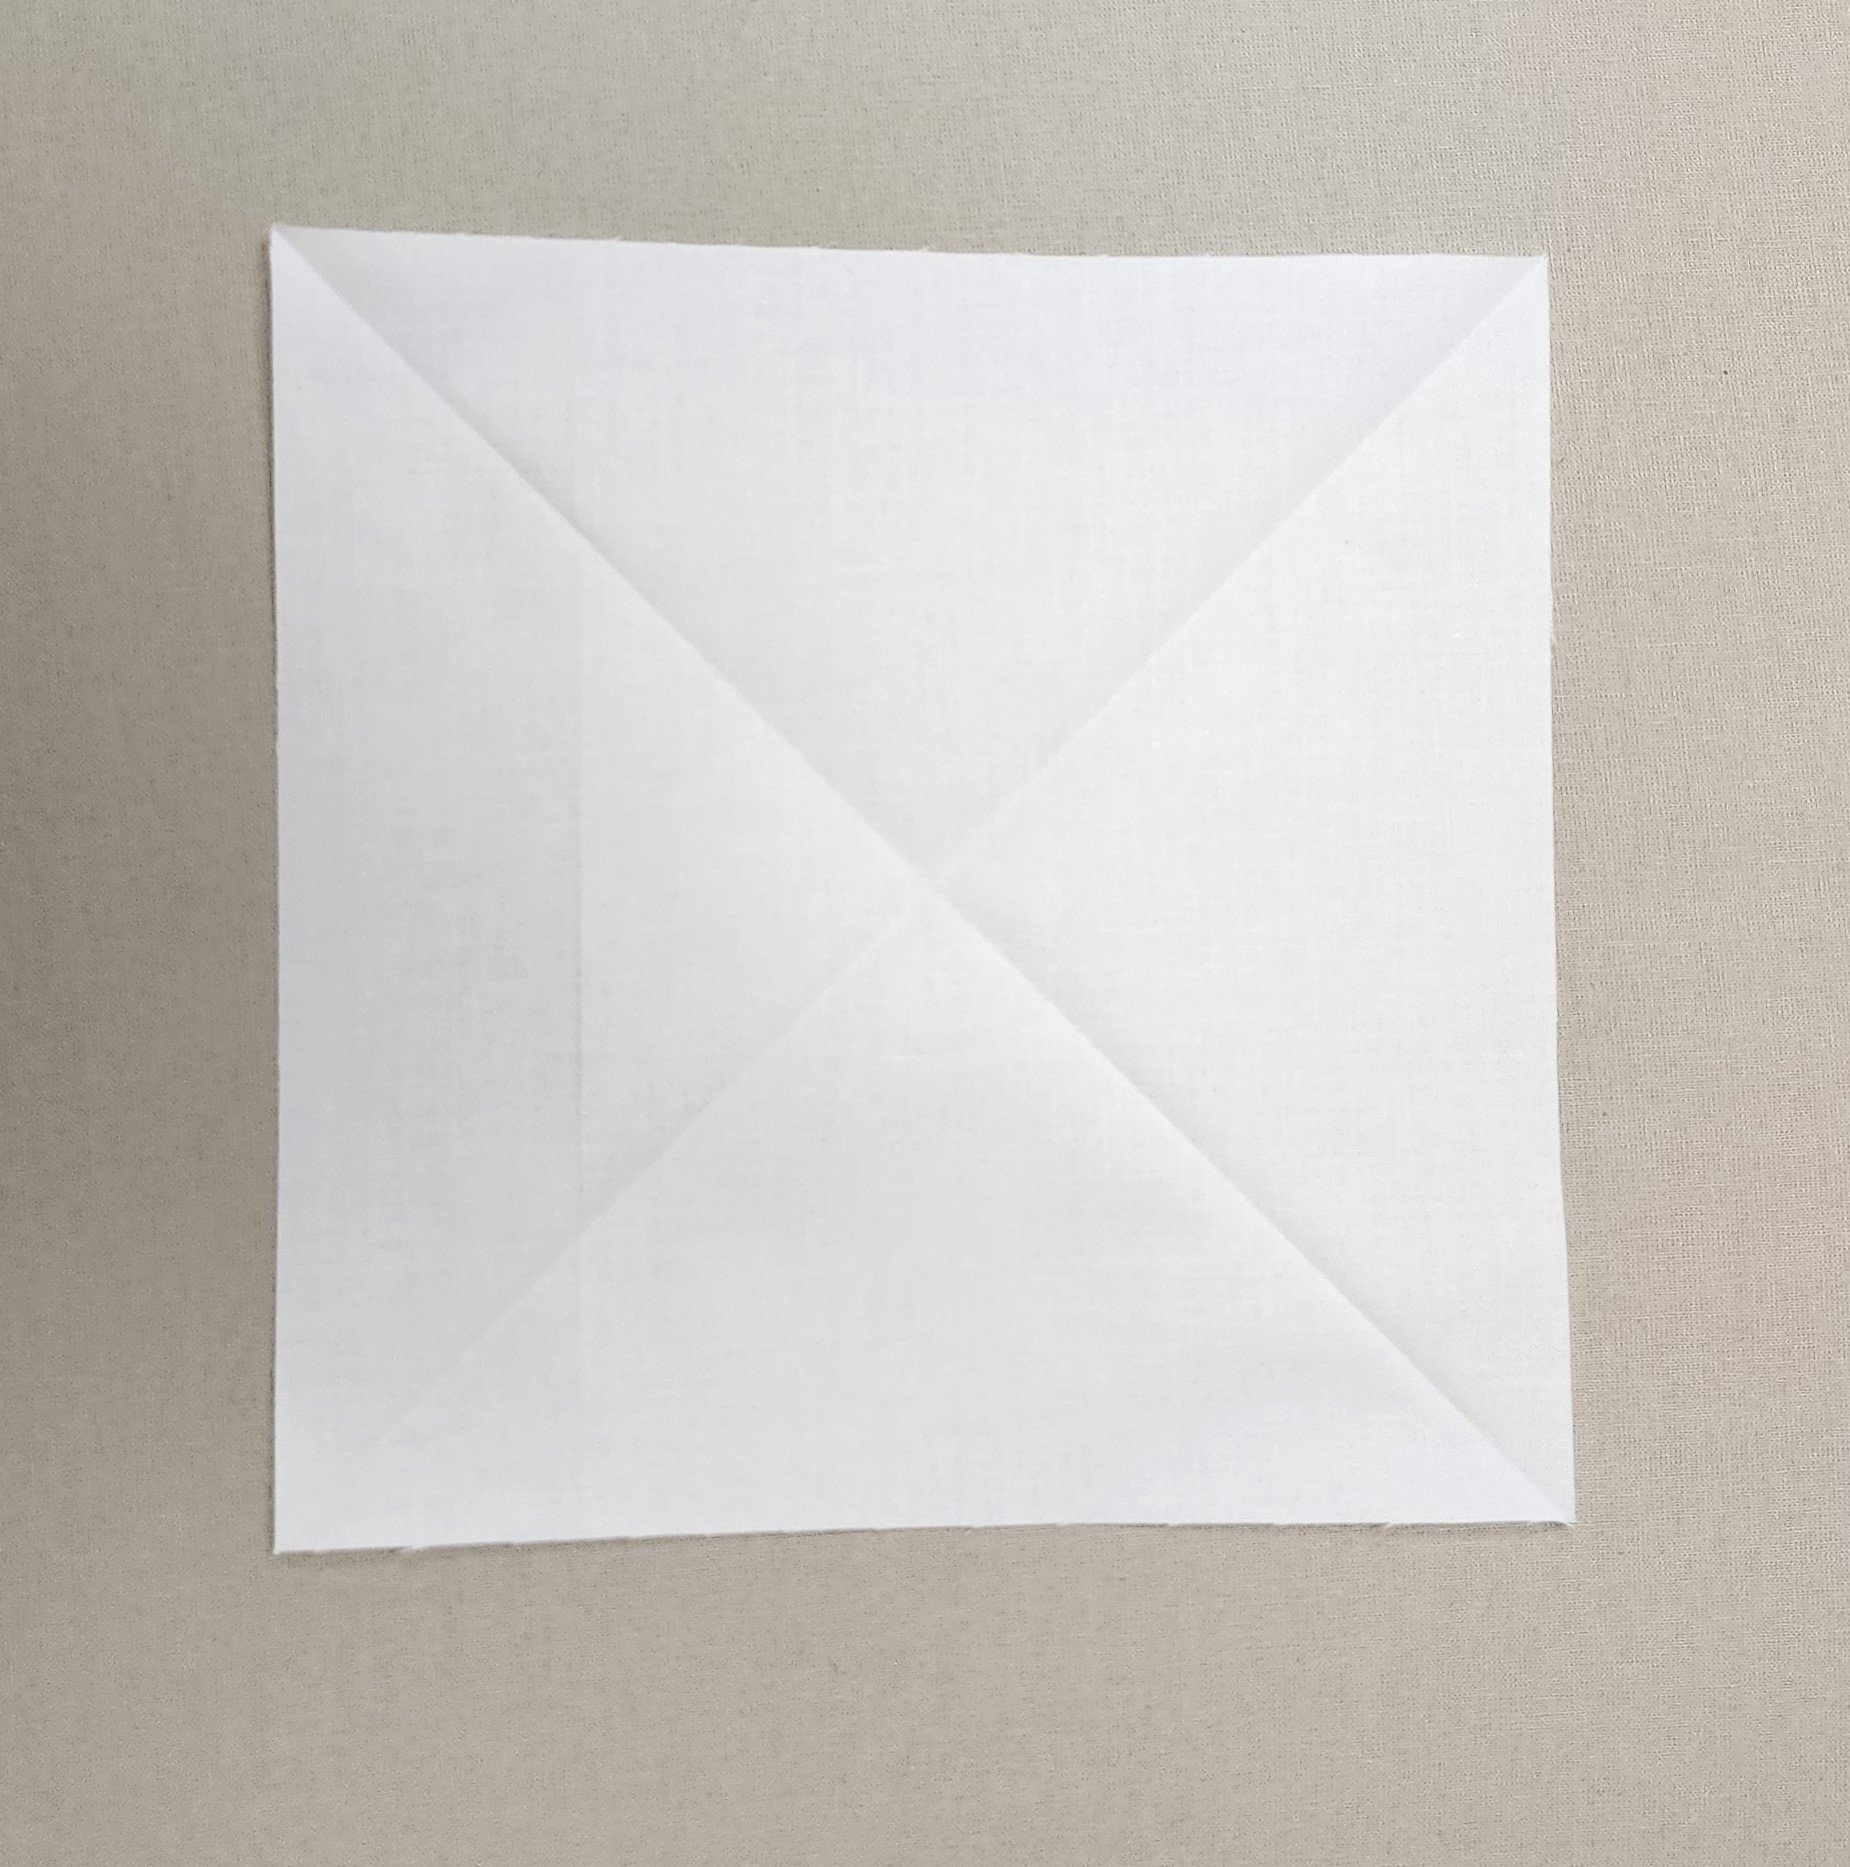
Repeat folding the other 2 corners together, and press. This will create an X with a center point.
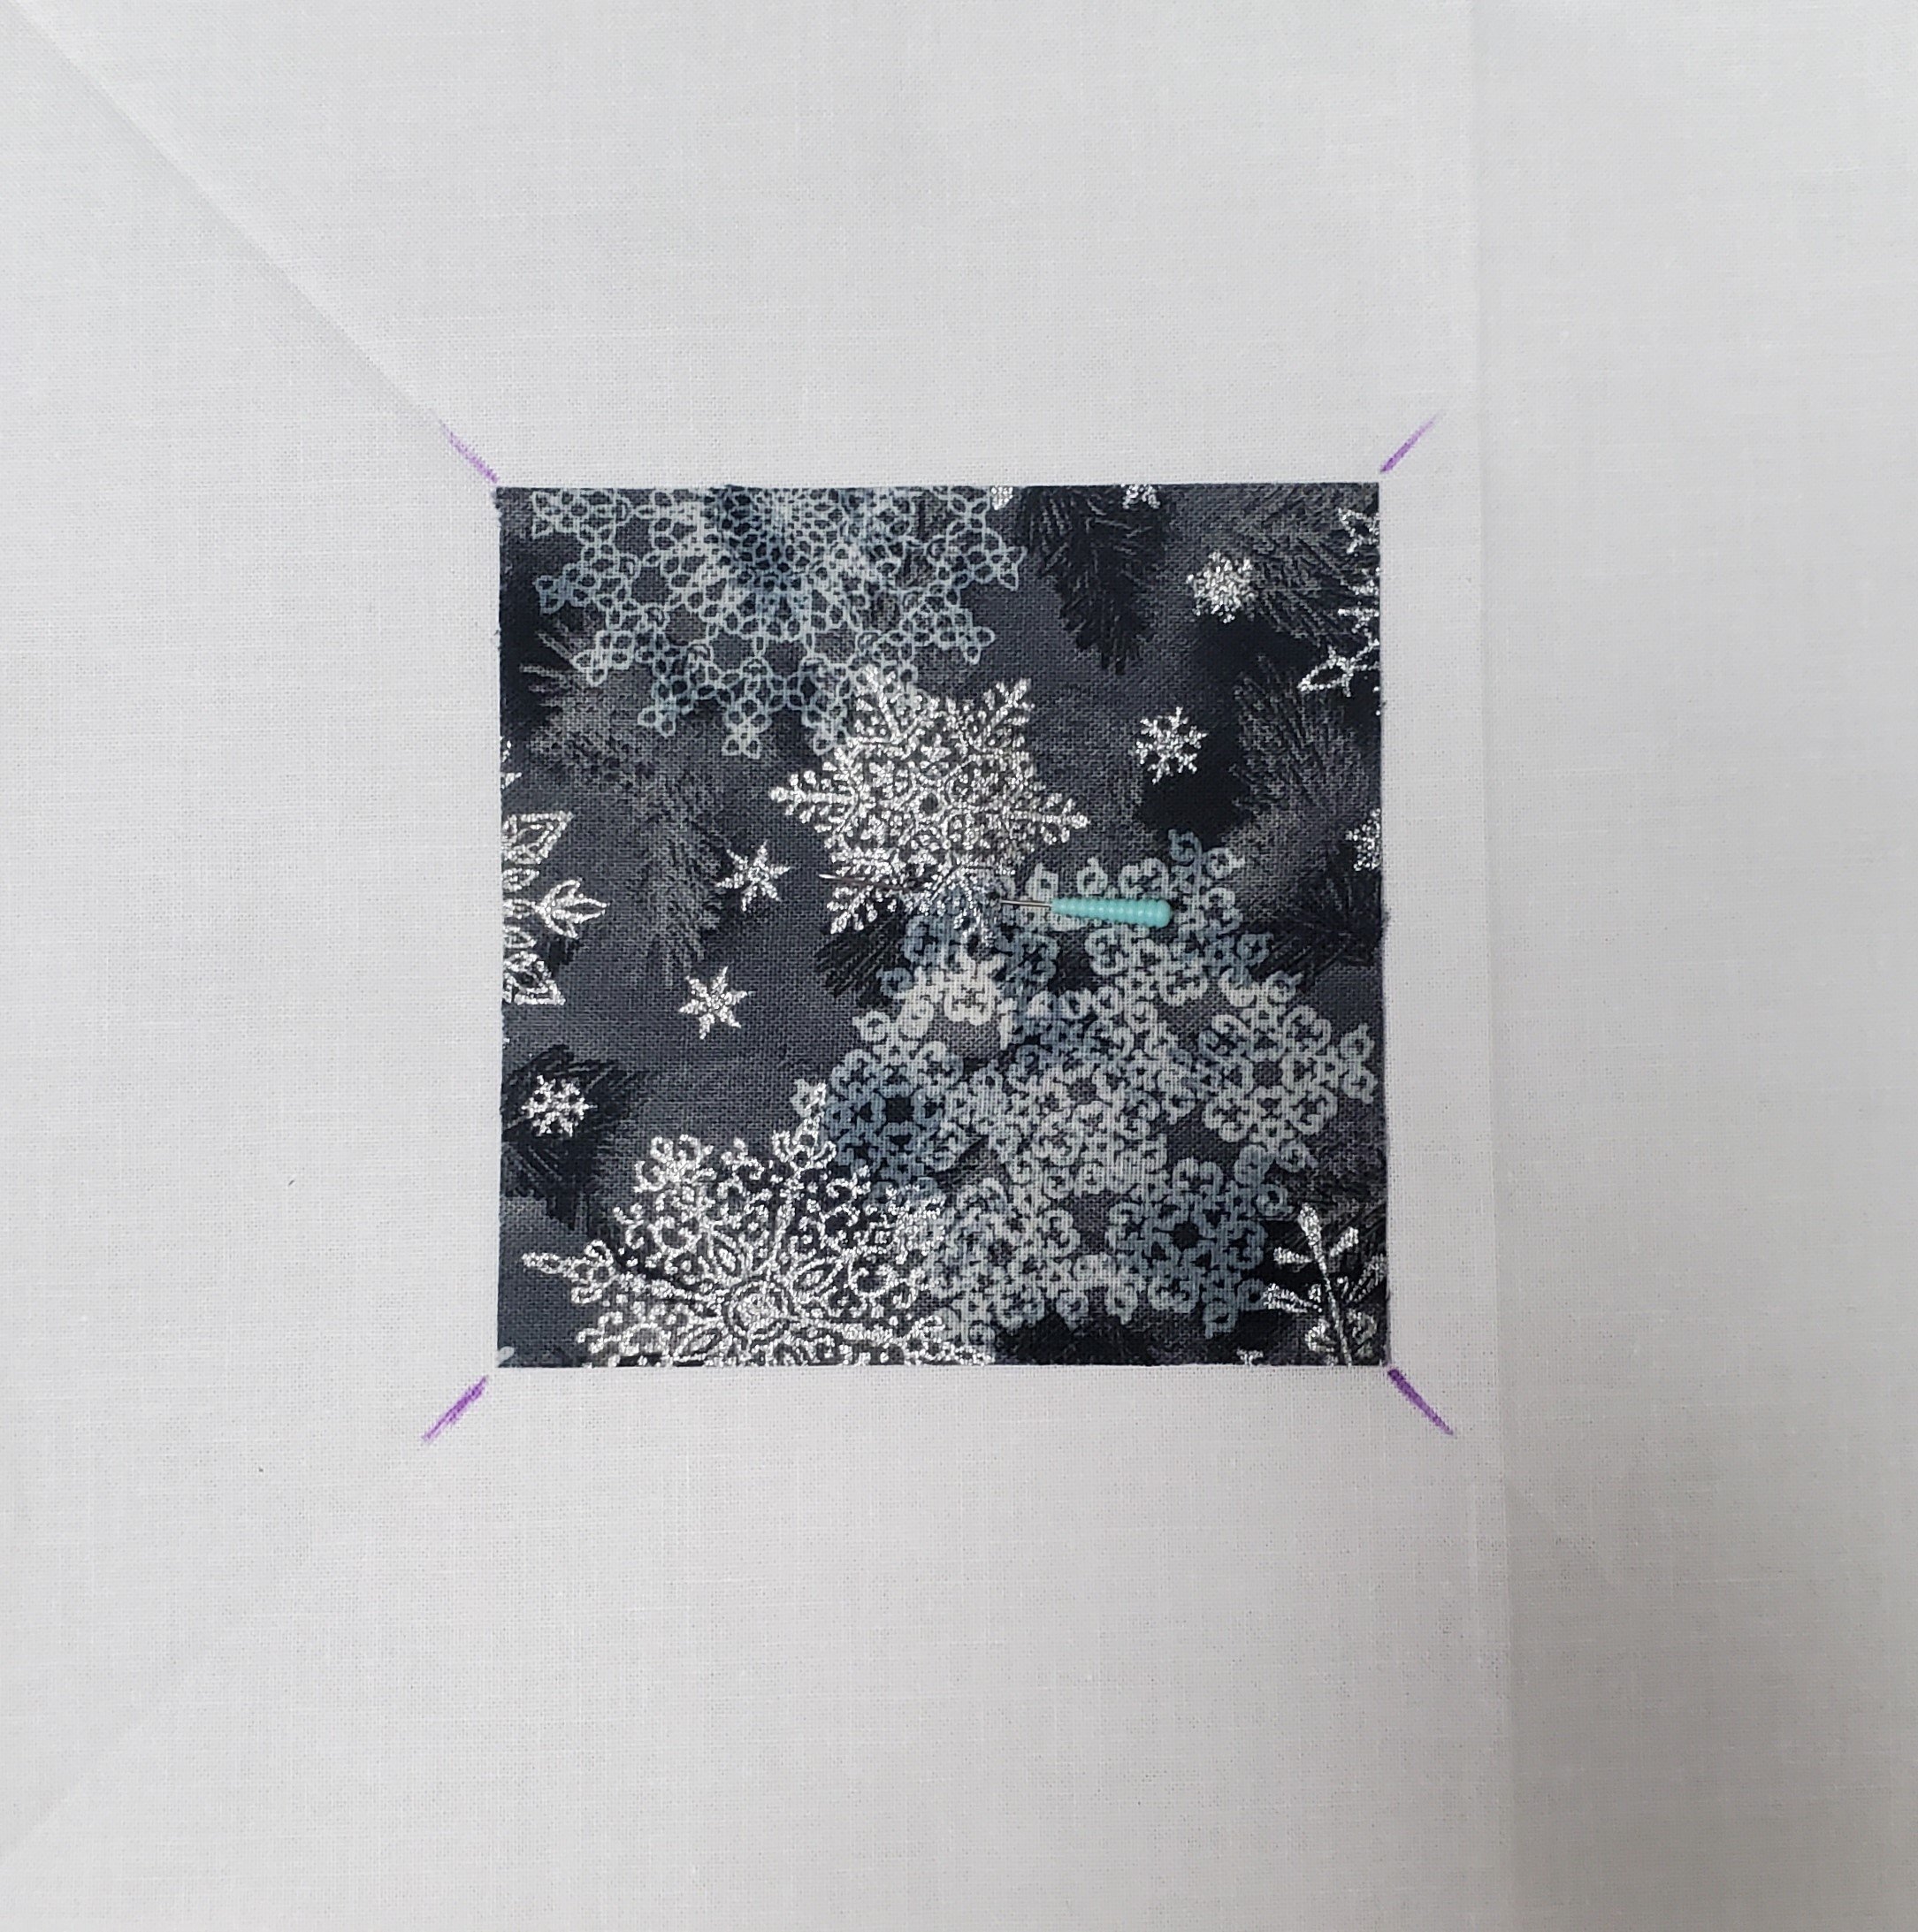
Position the center 3.5” square, right side facing up, in the center of your foundation fabric. You will know that it is centered when all corners are lined up with the creased lines. Pin in place.

Take 1 edge of the foundation fabric and fold to line up with the center square. Press.
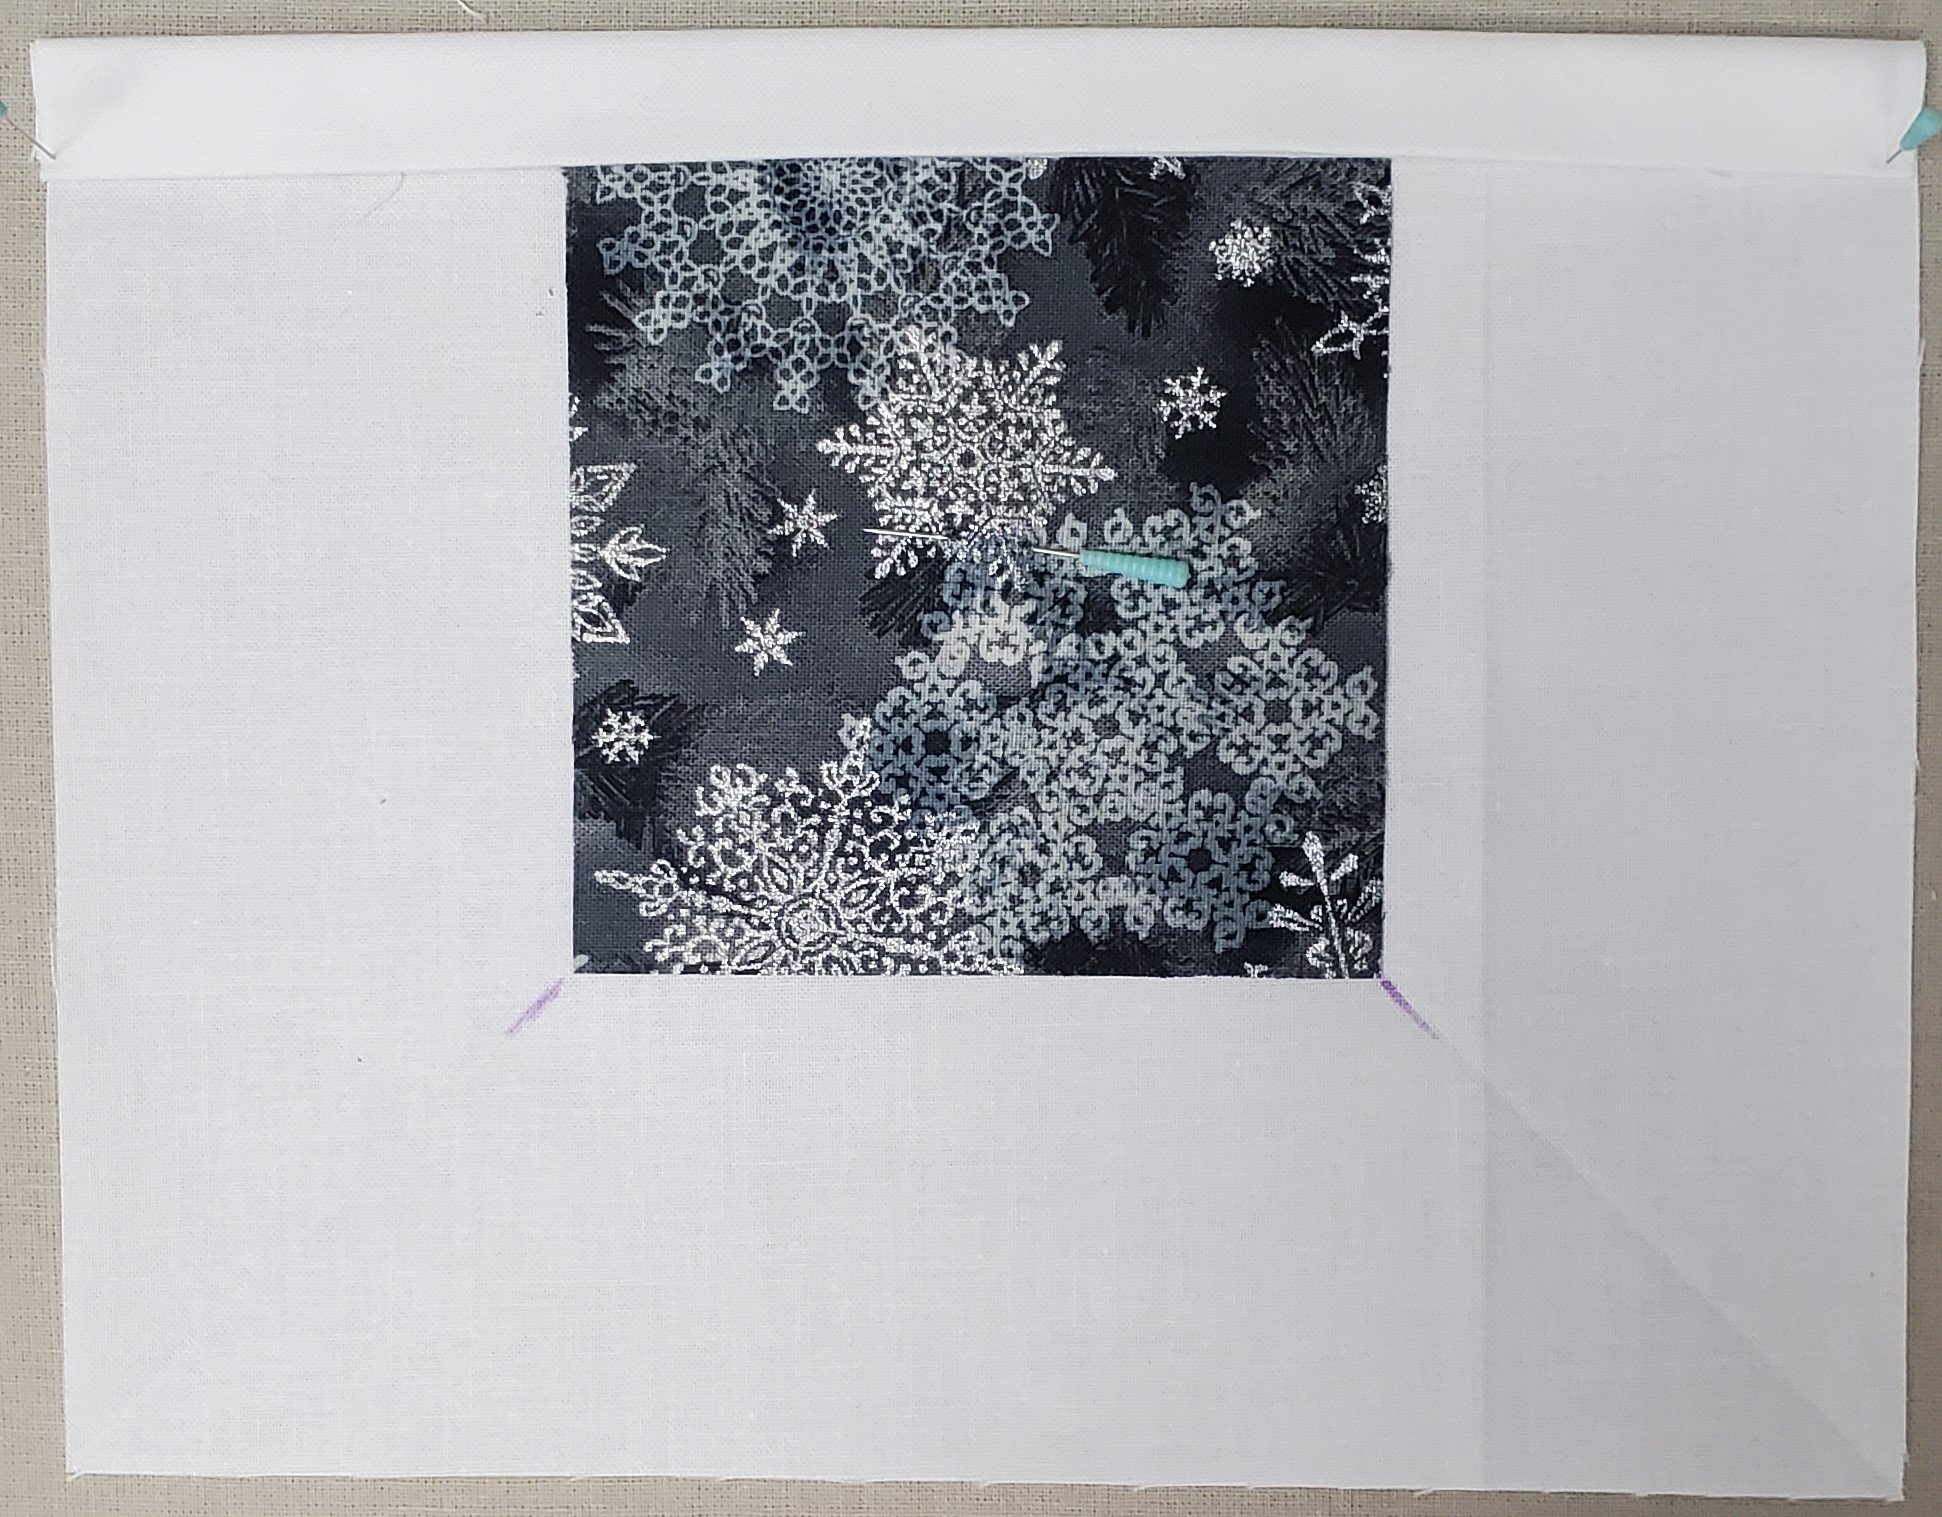
With the same edge of the foundation fabric, fold one time again to line up with the center square. Press.
Open up the folded fabric. You should have 3 creases.

Turn the fabric and repeat with the other 3 edges. This is what you should have once you are finished with the folding and pressing. I have marked the creases with a marking pen for you to be able to see the creases. This is not a requirement.
Your foundation is ready to piece!
5. Prepare your needle with a double thread and a quilter’s knot.
6. Piecing your block:

Place a light-colored strip right side facing down at the top of the center square. Match the raw edges with the top and right side of the center square.
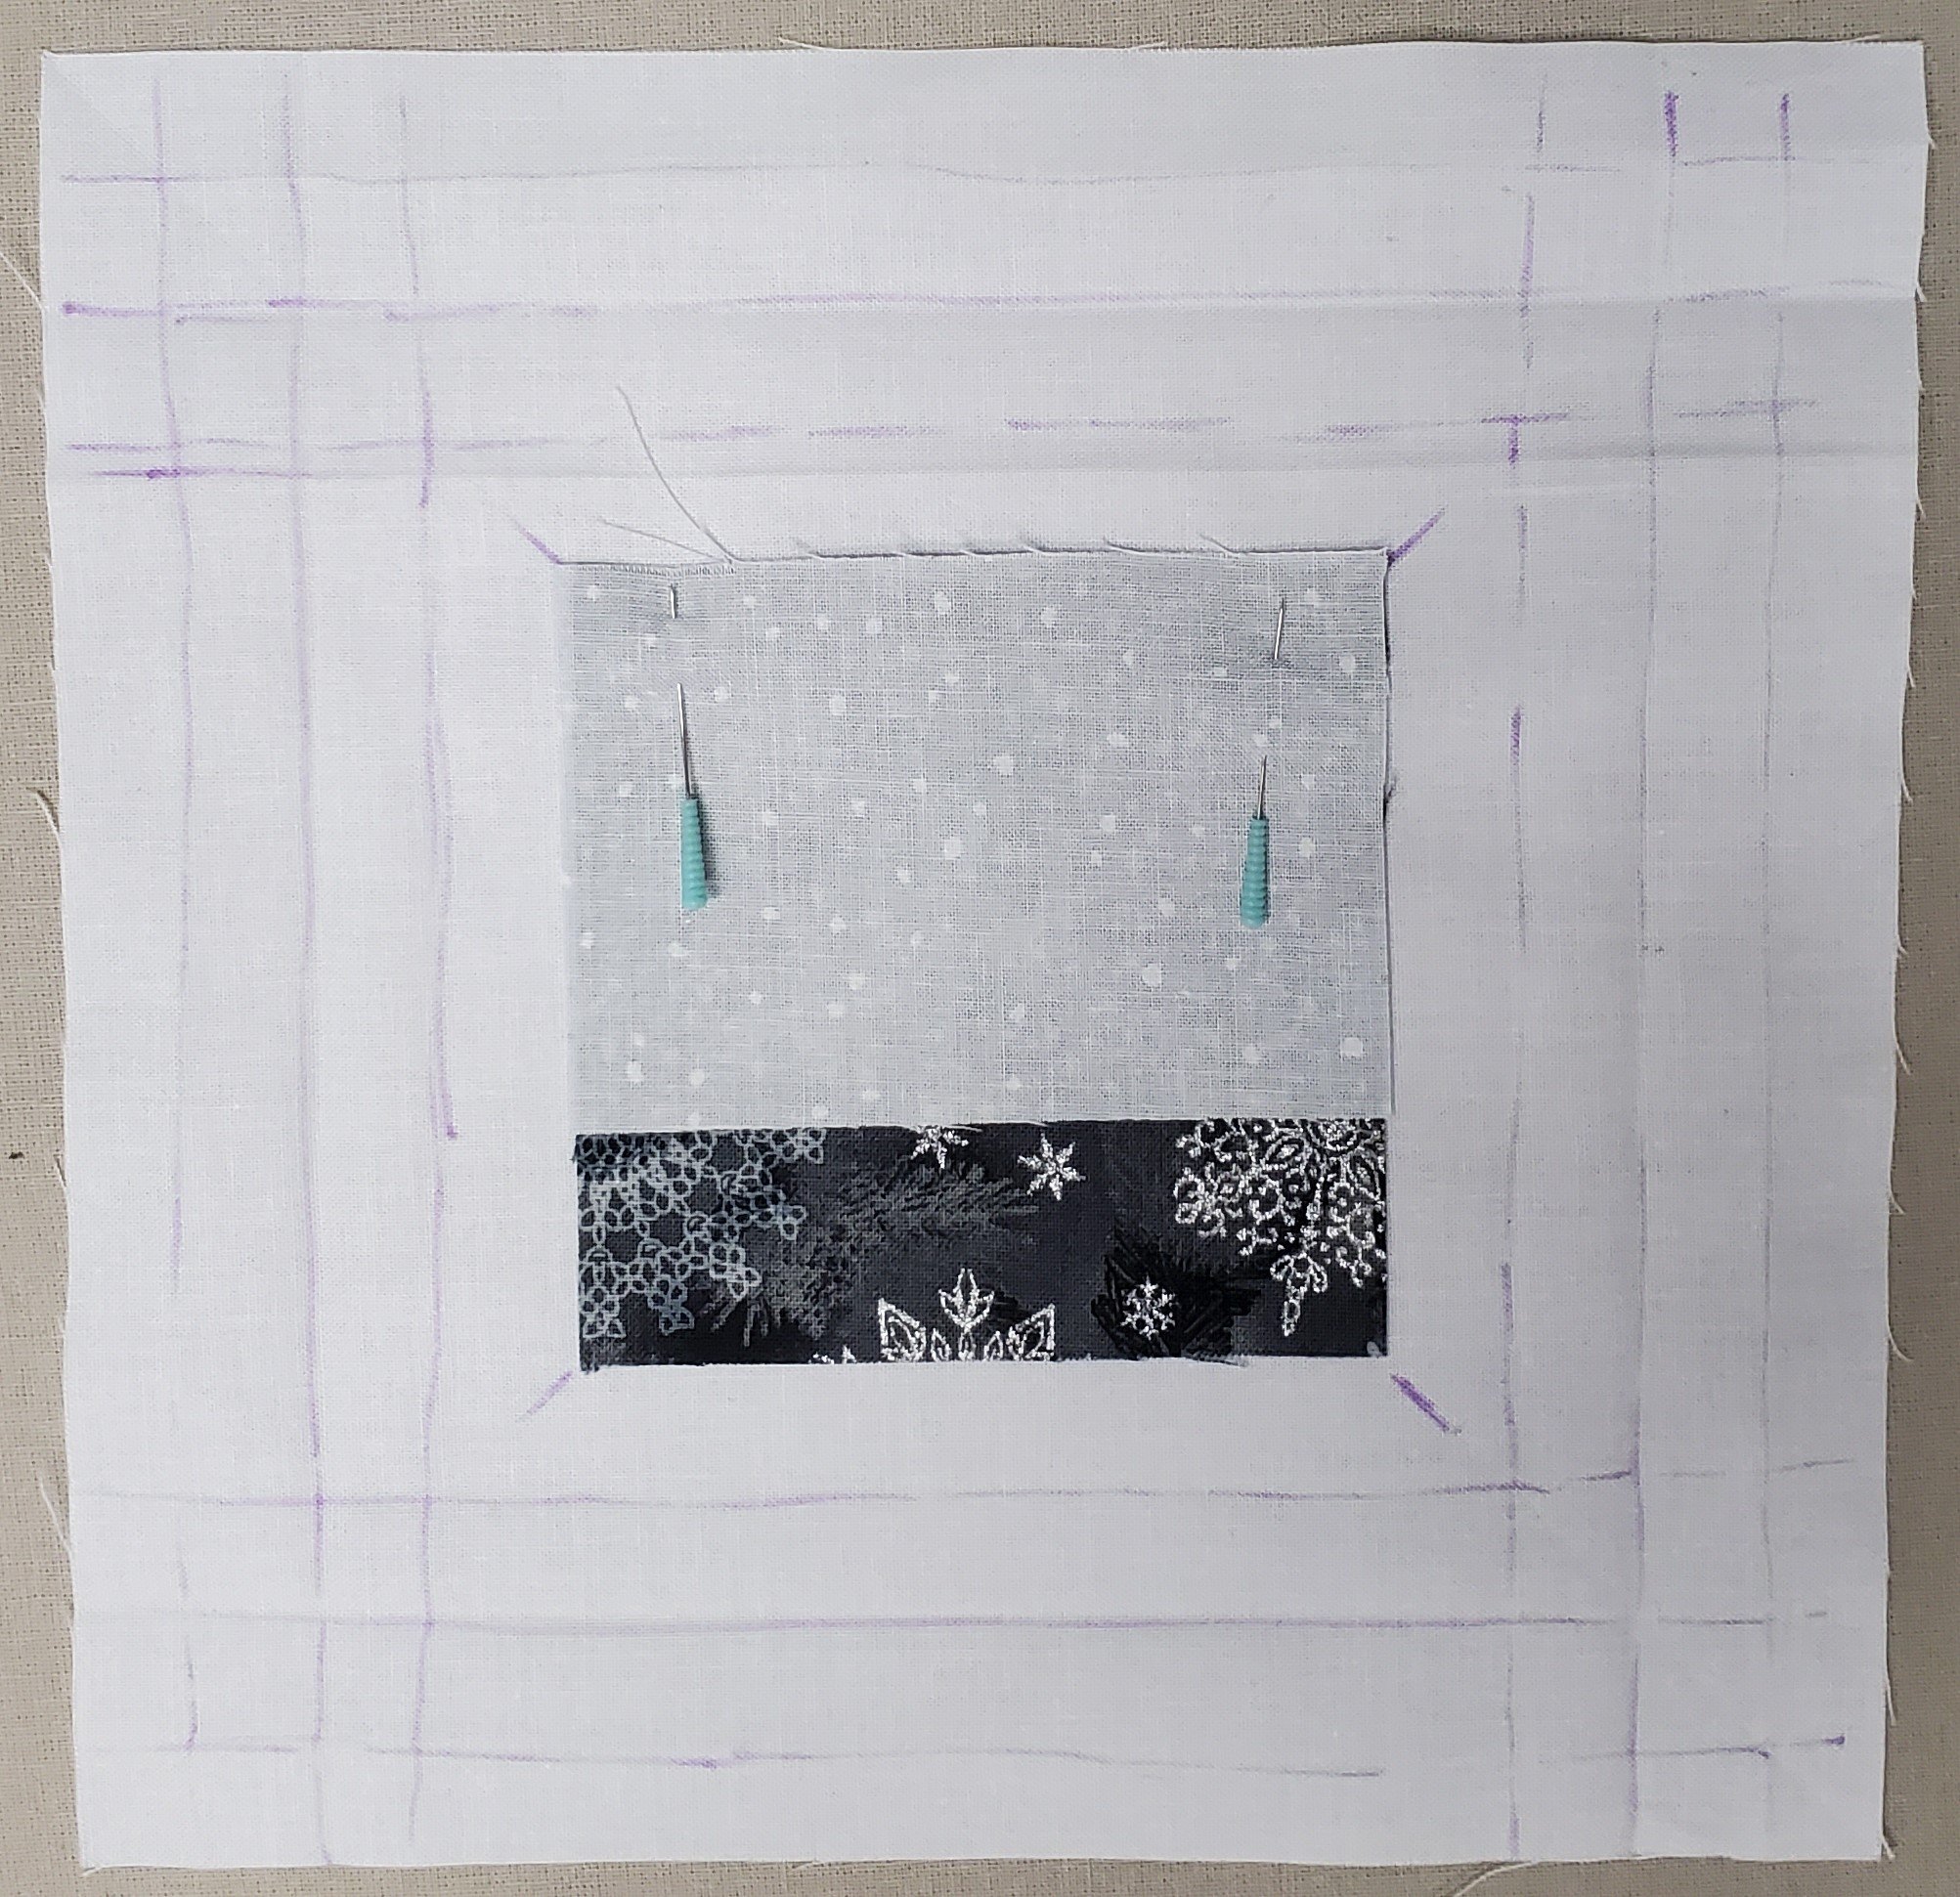
Trim the strip along the left-hand side of the center block and pin it in place. Be careful not to trim any fabric underneath the strip.

Keeping the knot on the top of the fabric, begin your stitch a ¼” inch from the top and a ¼” from the right edge.

Hand stitch a ¼” seam allowance with a running stitch. About a ¼” from the end of the center square, you will stop your stitch by dropping your needle to the back of the block.
This is the back of the block.
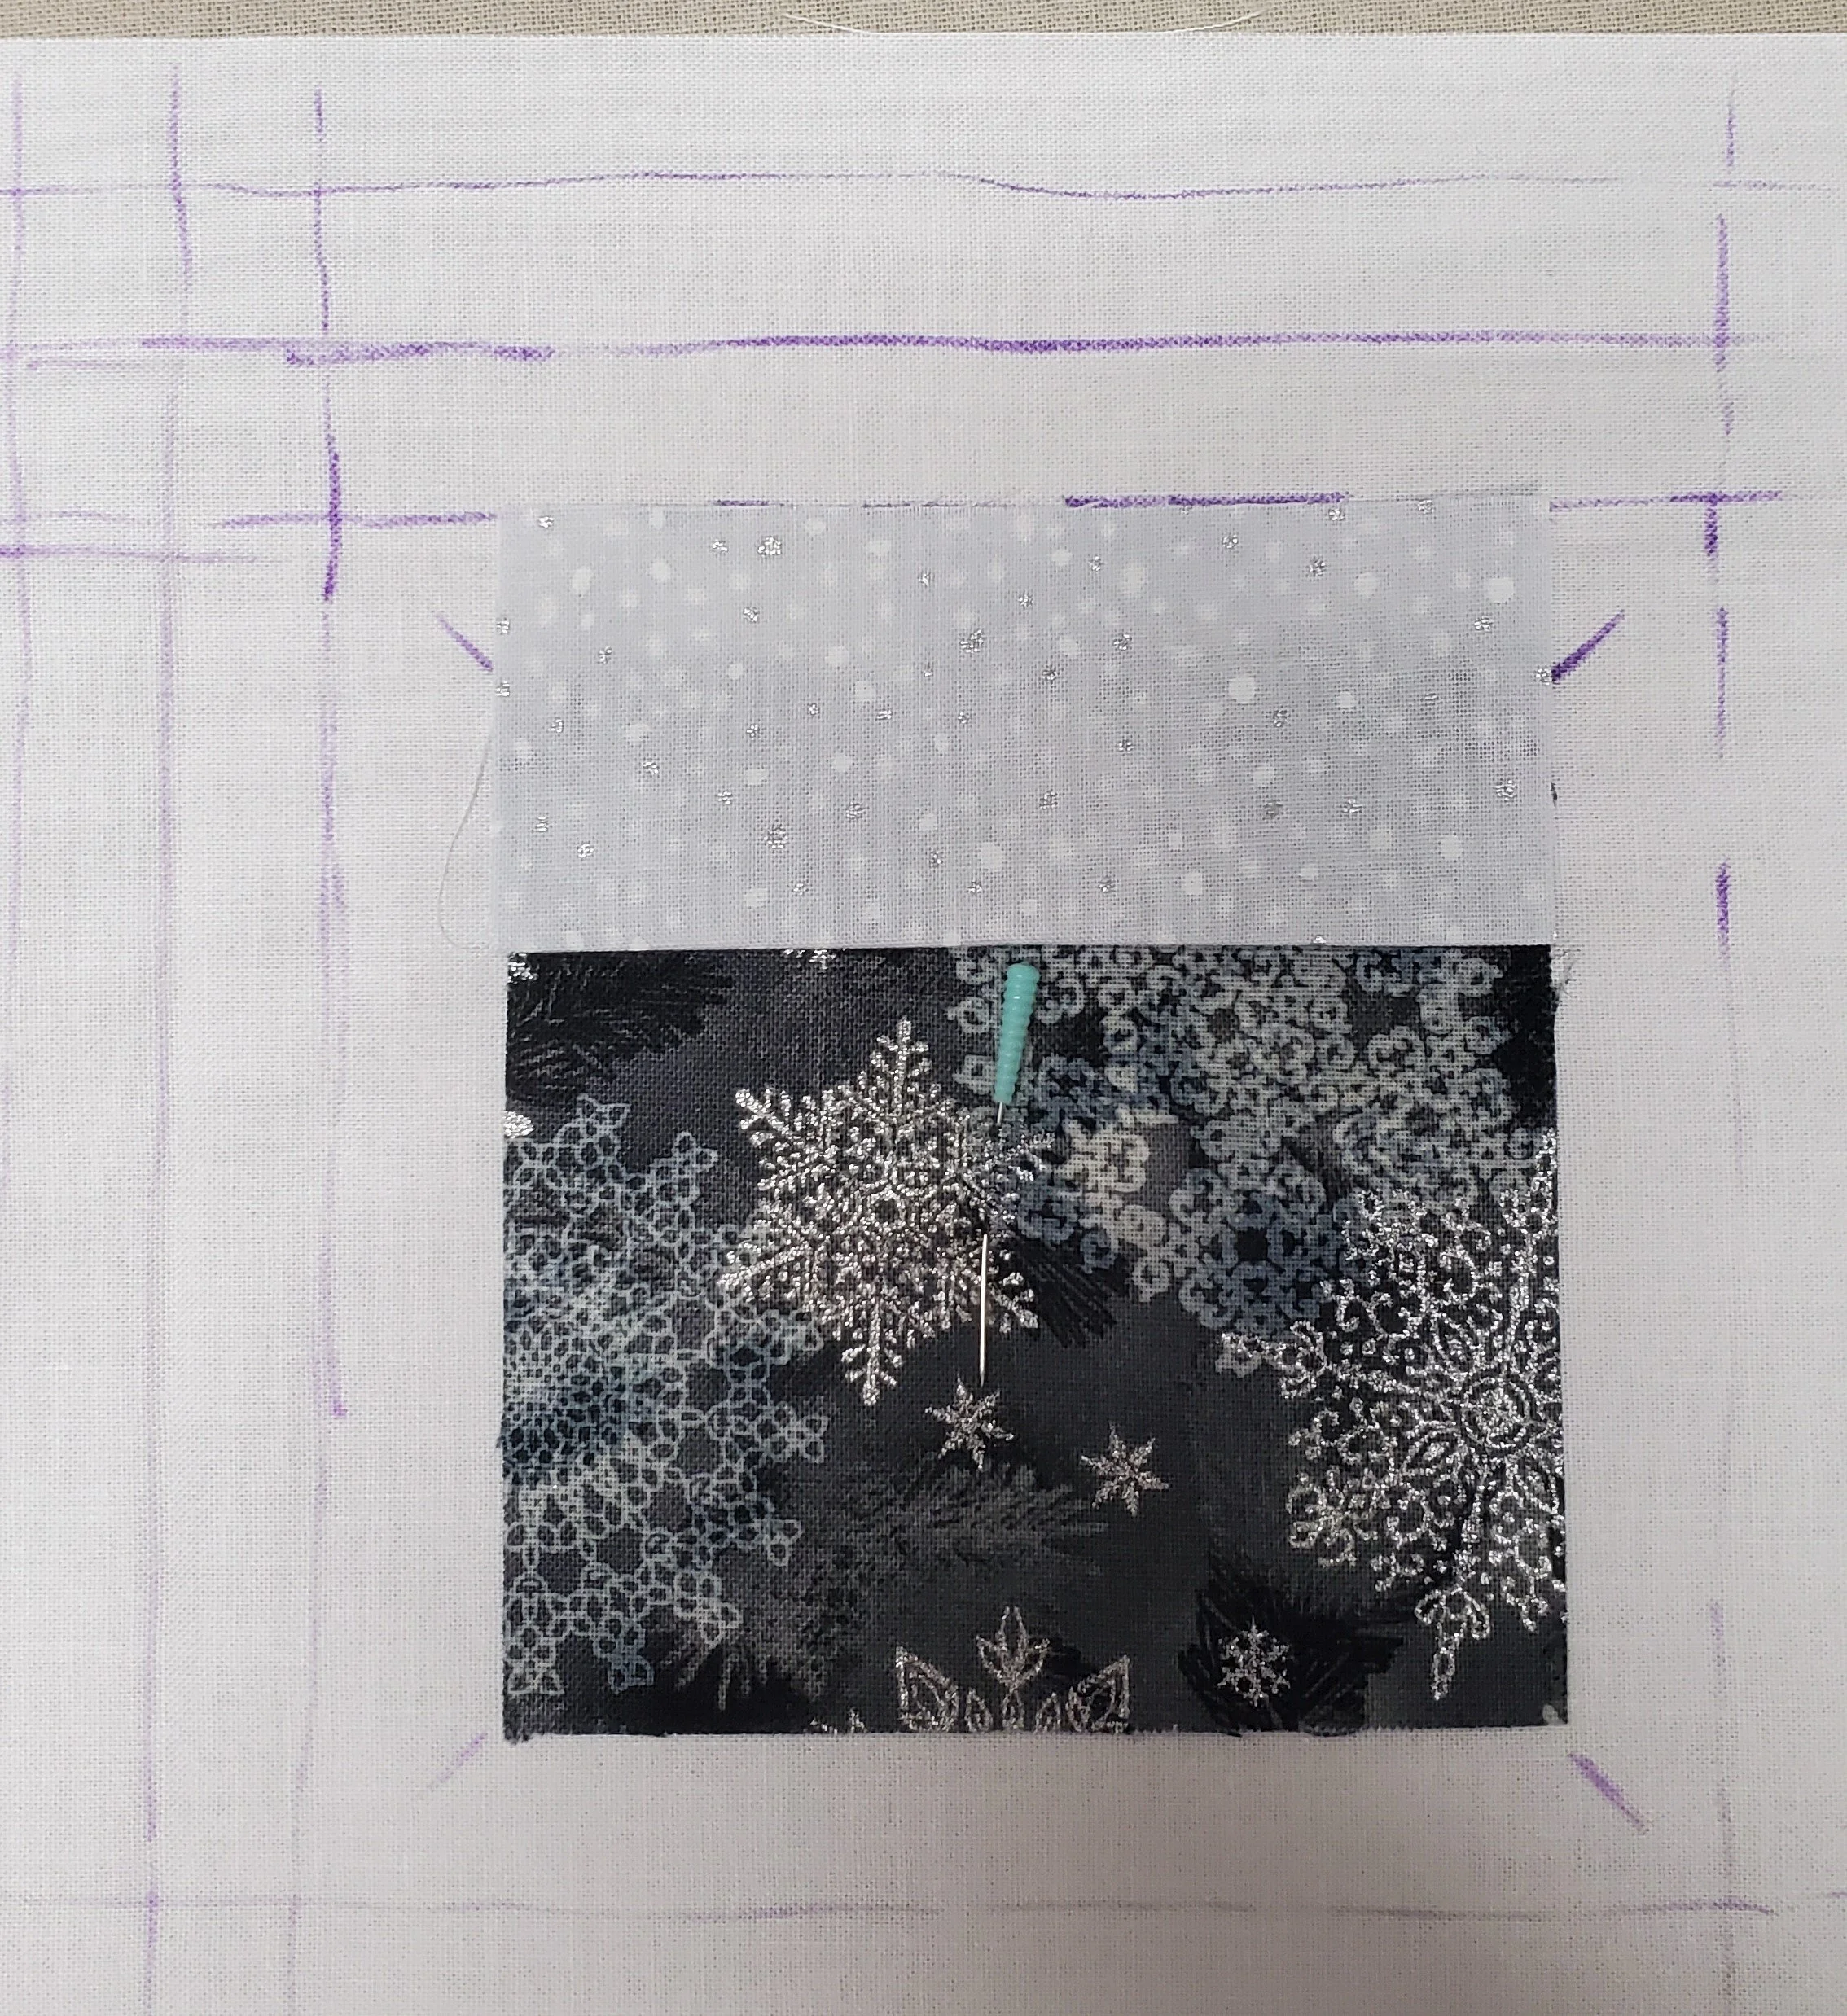
Fold the strip back, aligning the raw edge to the first grid line. Press. There is a fold in the strip. This is one of the unique things about the Manx Quilt. Pin in place.

Make it stand out
Rotate the block clockwise and place your 2nd light strip at the top. Match the raw edges with the top and right side of the prior strip.

Trim the strip along the left-hand side of the center block and pin it in place. Be careful not to trim any fabric underneath the strip.
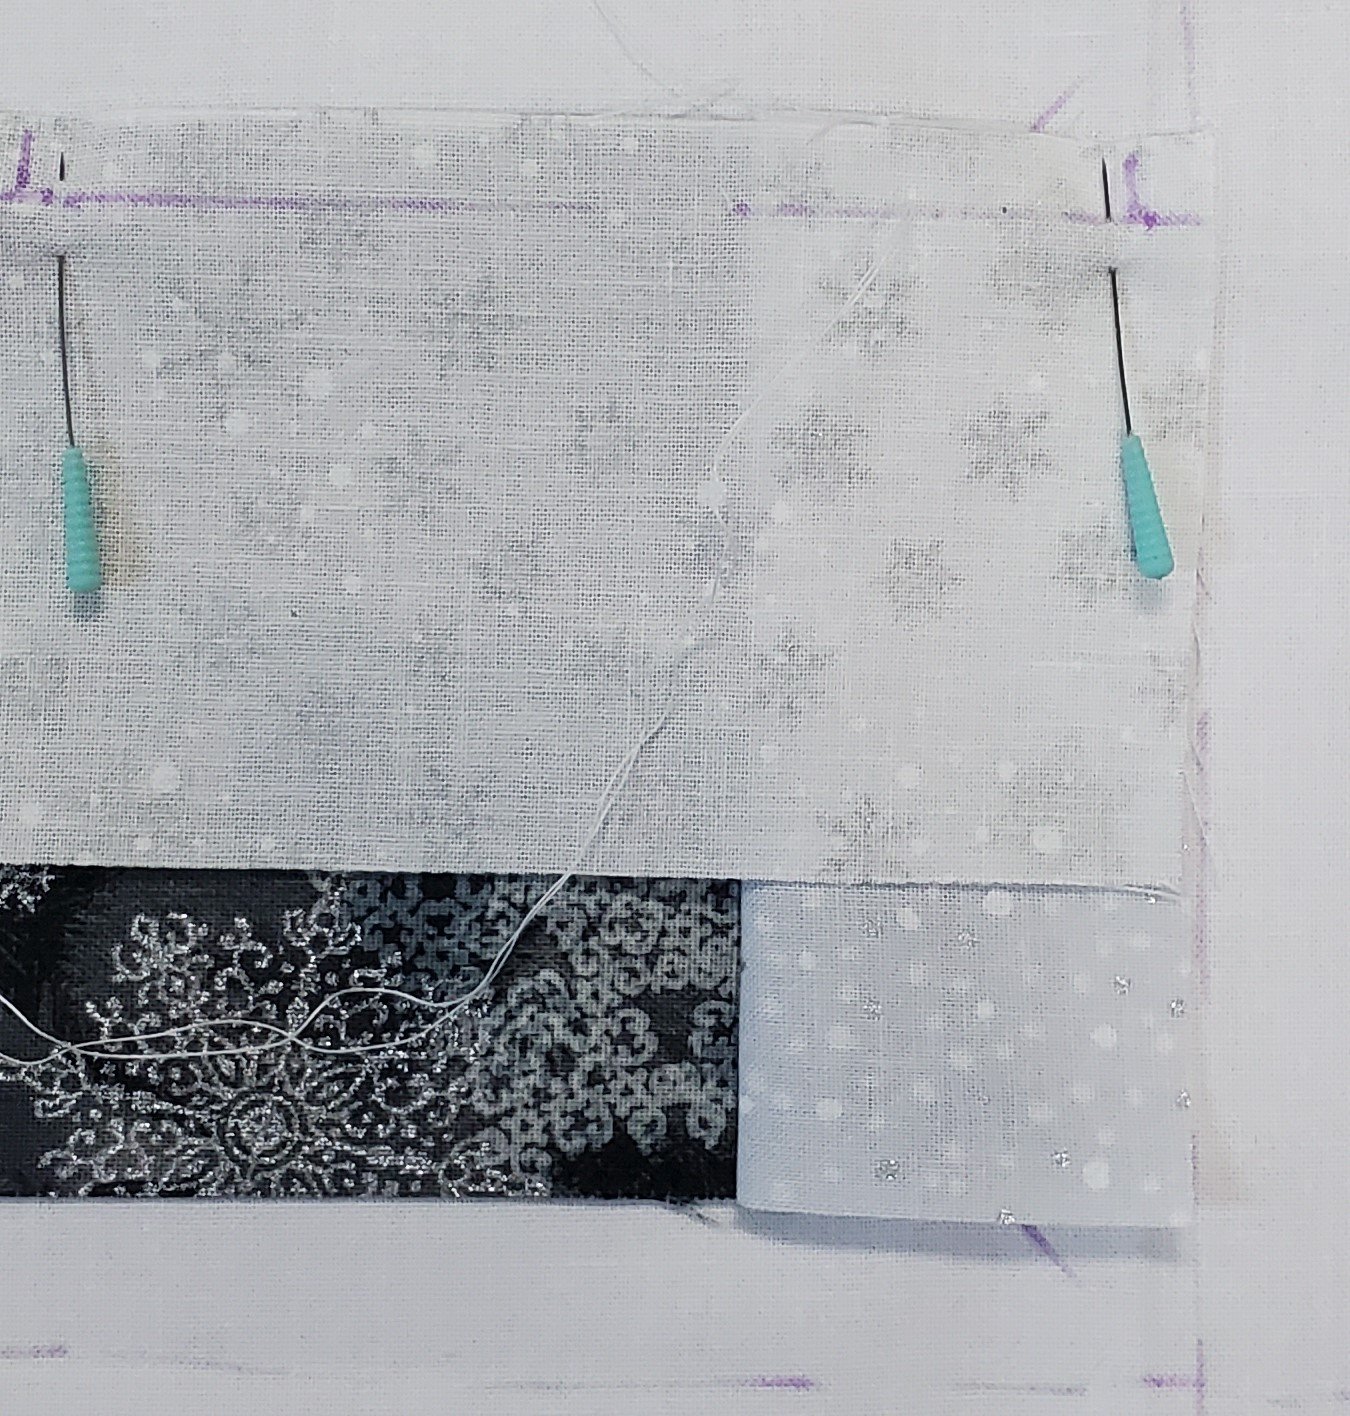
From the back, thread your needle to the front in the direction of the next strip, trying to keep your stitches consistent in length. This first stitch will not be at the beginning of the strip. This is normal!
Again, stitch across the strip your ¼” seam, and ending about ¼” sending the needle and thread to the back of the block. Fold and press.
Repeat with dark fabrics (light, light, dark, dark) until your first row is finished. (4 times total).

When you begin your second row, you will start with a light fabric. You will notice on the back of your block, the thread stitch goes a bit beyond the first row stitching. This too is normal. It allows you to make the turn for the next row.
When beginning your stitching, just like all the other times, make the turn and begin stitching in the direction of the new strip.
When you fold the second row, be sure to fold to the 2nd grid line! And the 3rd row folds to the 3rd grid line. Finally, the 4th row folds to the outside edge of the foundation fabric. You will simply continue adding strips and repeat the process instructed above until you have finished all the rows for your quilt block.
****All the knots are buried inside the folds of the strips and are not visible from the back side or the front side of the block. When you need to change the thread, you may take a couple of backstitches in the seam allowance. Or, you can simply tie a square knot.
On the final strip, you will end the stitching about a ½” before the end of the strip (instead of a ¼”) to allow for joining of the blocks. Also, end the thread on the top instead of the back. This will allow you to tie off and hide within the fold.
7. Once you finish your first block, repeat to make the number of blocks that you desire for your quilt top.
Joining the Blocks:
To join the blocks, first decide on the layout of the blocks. Then, secure the foundation fabric out of the way by pulling them back and pinning. Next, place blocks right sides together. Stitch the blocks together using a 1/4” seam, being careful to only stitch the top side of the blocks (not the foundation fabric).
Pull the foundation fabric back in place, overlapping the two. I folded down the edge of one of them to create a finished edge and then sewed the folded side down to the other foundation with a simple blind hem stitch. (Be careful not to go through all of the layers of the fabric, just the two foundation fabrics).
Once all your blocks are sewn into rows, adjoin the rows together with the same method.
Pictures for clarification will be coming soon!
Your Quilt Top is FINISHED!
Your hand stitching is your quilting, and there isn’t any batting! You can make any size your heart desires-wall hanging, throw, twin, etc! Not only is this such a unique method, but it truly will add beauty and joy to your world! Happy Quilting!