
Straight as a Pin!
Are pins really that straight? Usually…however, if someone got sloppy in the manufacturing, too much pressure was put on it or it was not used correctly, or if you slammed a sewing machine down on it (shhh-you are not supposed to leave the pin in while you sew)…maybe not so much. The same thing goes for cutting your fabric. If you do not cut it correctly or take special care in this process, your fabric will not be straight and your blocks or quilt will come out wonky. Don’t get me wrong. We all love little imperfections inside a quilt, as it is a homemade beauty. However, when piecing a quilt, there is such a gratifying feeling of success when those block seams nest well, line up, and finish just as they are supposed to. I do not know about you, but I get so happy and excited and finish with a little happy dance. It just makes my heart sing!
Let’s get started on cutting our fabric, straight as a “good” pin!
1. Prep Your Fabric
You have to prep that fabric. When it comes home, fabric is such a mess with wrinkles and creases. Some quilters prewash all their fabric. This does a few things. One, it cleans it from any debris, dirt, or bacteria (Sorry, I am a nurse that cannot turn it off). Second, if there is any bleeding that could occur, you will see it at this point. You could continue to wash it until the bleeding stops with color catchers. Lastly, if the fabric is going to shrink, it will get that part out of the way now instead of when the quilt is put together. Not everything will shrink at the same rate. Shrinking it now is a good argument to prewash your fabric. There are probably other great reasons to prewash your fabric. But, I must confess, I am not one to prewash.
However, I am one to starch my fabric before cutting. The reason to starch that fabric is to give you a stable surface that is also stiff. This just makes things so much easier to cut more accurately. Some quilters will use steam with their iron instead of starch. Although it does remove wrinkles, I find that steam can easily stretch your fabric out of shape and it does not finish as stiff.
You can watch my video on prepping your fabric-click here.
2. Supplies

This method uses a rotary blade (do not forget to change your blade, if needed), a self-healing cutting mat, a quilting ruler (or 2), and your fabric.
3. Square your fabric
Again, the store where you bought your fabric does not square your fabric, when they cut it. So what does it mean to square your fabric? It means you are giving yourself a straight line to begin with.
Fold your fabric in half-selvage to selvage, and place the selvage at the top or furthest away from you.

The different colored tightly woven strip is the selvage. There is one on each side.
It is a good idea to do the squaring dance, before lying the fabric down on your cutting mat. This can be best described by video. You can watch the video that a link is included for at the bottom of this blog post. For some fabric, the selvage has a white strip. However, a selvage is an edge of a piece of fabric that is woven so that it will not fray. That fold is going to be your first true straight line. If you fabric is longer than your ruler is, you can fold it and make it dance again.
Taking the first fold to be with your selvage. You will notice that the second fold line, at the bottom (or closest to you), is now your true line.
*If you are a beginner, I would not suggest folding your fabric twice. The second fold allows opportunity for inaccuracy. I have cut a ton of fabric, and still do not fold twice. There is just too much room for error to occur.
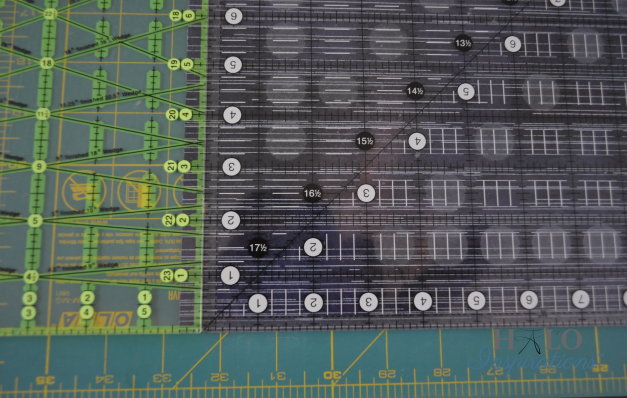
As we should not trust the lines on our mat, we want to place our ruler on the fabric, lining up a line on the ruler with that true line. If you are right handed, the ruler will go on the right side.

This is the right hand view.
If you are left handed, the ruler should go on the left.
Be sure that the fabric is on the ruler line, not above it or below it.
Then, while pressing down on the ruler to prevent it from sliding, use your rotary cutter and cut the end of the fabric. Now we should have 2 straight lines:
one on the bottom and one on the side. These are your 2 “true” lines that you will use for referencing.

True line on bottom and true line on the right.
*At this point, you will need to flip your fabric to the other side. I will add that this will create an opportunity for your fabric to shift. Although this is common practice, you must be careful to not shift the fabric and be out of square. Here is another alternative to prevent shift from happening.
Instead of lining up the ruler on the side of your dominate hand, line up the ruler on the opposite side. Be sure to leave enough of the edges of both fabrics.
Then line up another ruler next to the first, lining up the lines on the ruler. This ensures you are still square.
Remove the first ruler. Then, while pressing down on the ruler to prevent it from sliding, use your rotary cutter and cut the end of the fabric.

The first ruler has been removed, and we are ready to cut the wonky edge off to create our 2nd “true” line.
Now we should have 2 straight lines: one on the bottom and one on the side, as described above.
We are now ready to cut our strips.
4. How to cut strips from your fabric
For this “Inspiration,” we are going to use 2.5” strips to demonstrate. This is the process for whatever size your pattern calls for. Line up the 2.5” line ON the straight edge you just made of the fabric and along the bottom edge.

3rd Triangle

4th Triangle

Nice straight line along the bottom of the triangles.
2nd Layer:
In between each triangle on the first layer, place and pin a new triangle a little less than a ¼”. Eyeball the point of the new triangle to be centered in between. Place all 4 triangles, keeping the bottom edges in line.


3rd Layer:
In the same order as the first layer, place and pin triangles a little less than a ¼” down from the 2nd layer and with the points of triangles centered with the first layer. Again, keep the bottom edges in line.


4th Layer:
In the same order as the 2nd layer, place and pin triangles a little less than a ¼” down from the 3rd layer and with the points of triangles centered with the 2nd layer. Keep the bottom edges in line with each other.

Continue to add layers of 4 triangles, repeating this process, until you have reached the other side of the wrap strip. If it is not straight (like mine), be sure to cover all the Styrofoam!

Place your choice of ribbon around the final triangle layer, to hide the pins and open edges. I simply used pins to attach, but you could also use a glue gun.
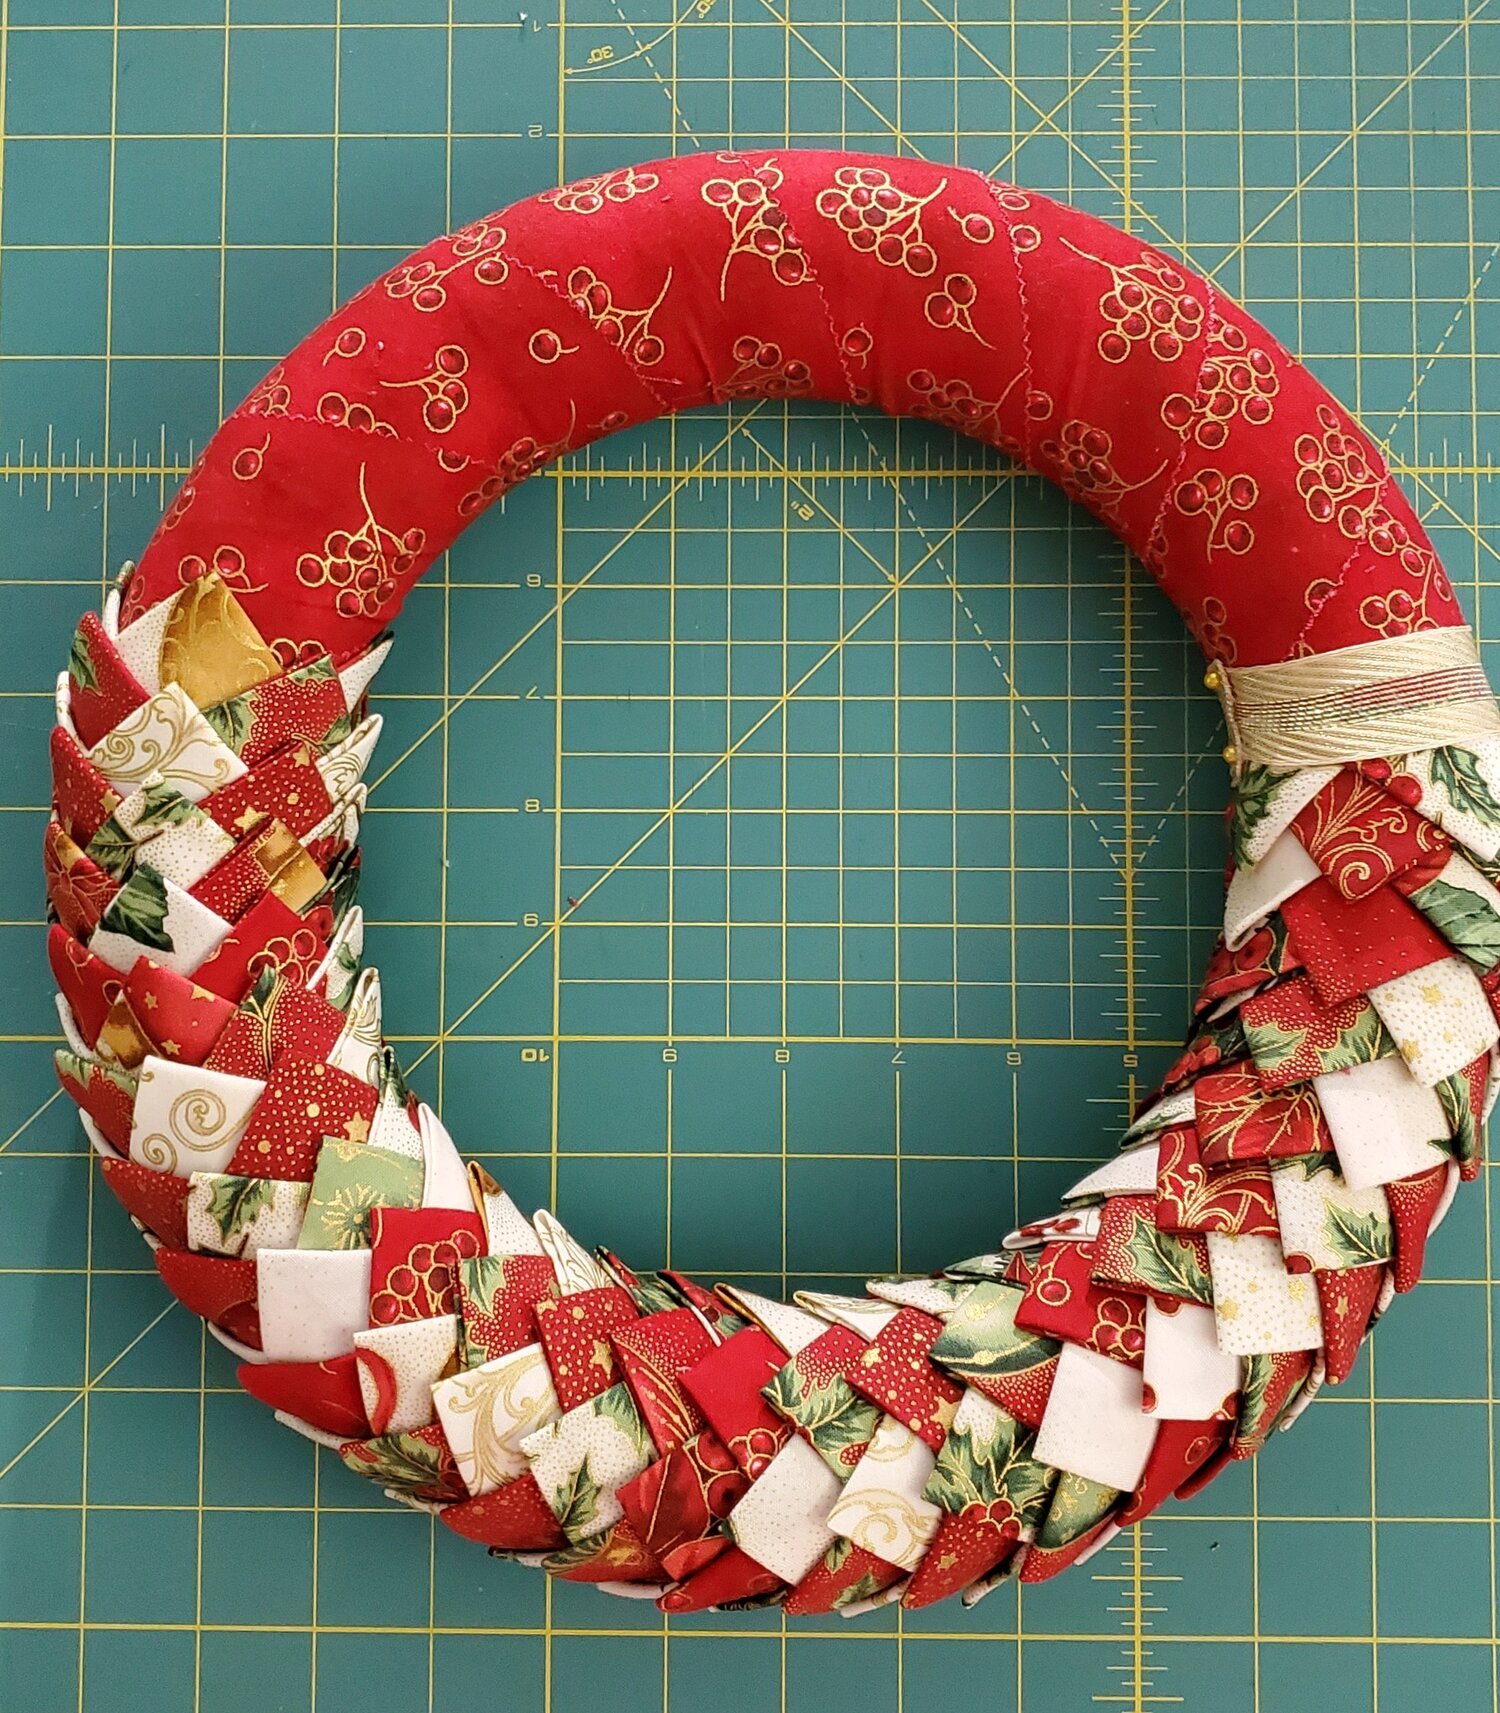
Embellish your wreath as desired and hang!
